Trigger from Zapier
| Component | Type | Description | |
|---|---|---|---|
 | Trigger from Zapier | ▶️ trigger | trigger a workflow from Zapier |
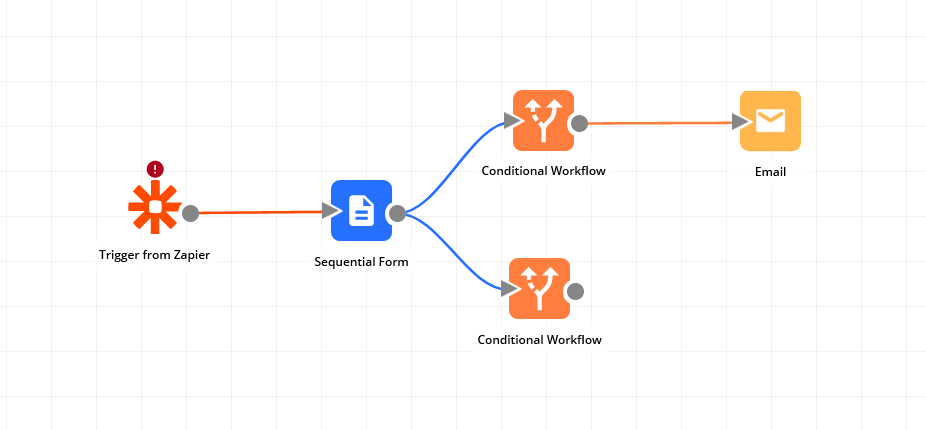
The Trigger from Zapier component allows you to trigger a workflow from Zapier as part of a Zap. This component uses the Workflow86 app which can be found in Zapier. To use this component, simply drag and drop it into the canvas as the trigger component for your workflow e.g. in the workflow below, Zapier will trigger the sequential form to be sent.
The component has 8 steps and will guide you through each step along the way.
Step 1 Choose Workflow86 app in Zapier
In your Zapier account, search for the Workflow86 app and select "Trigger a workflow" as the action
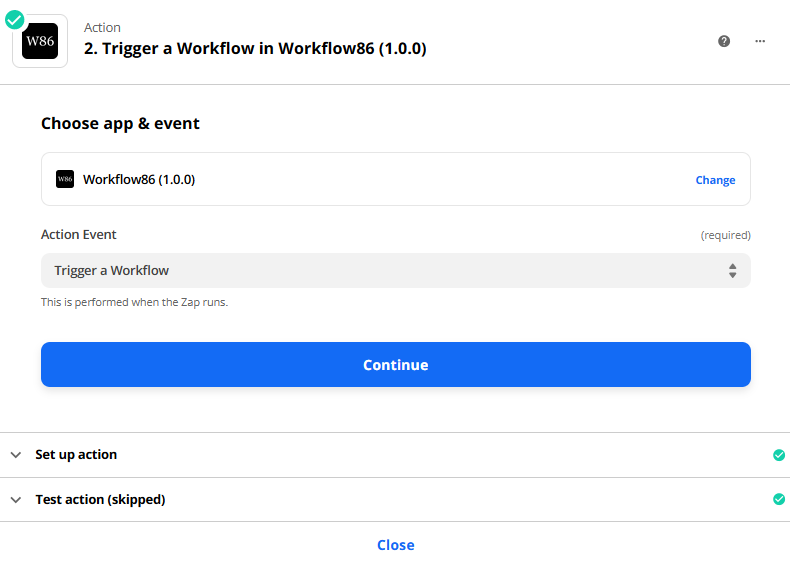
Once this has been done in Zapier, proceed to step 2
Step 2 Copy and paste endpoint and token into Zapier
In step 2, you will find two pieces of information that you need to copy and paste from Workflow86 into Zapier: the Sample Endpoint URL and the Security Token. This information can be found here:
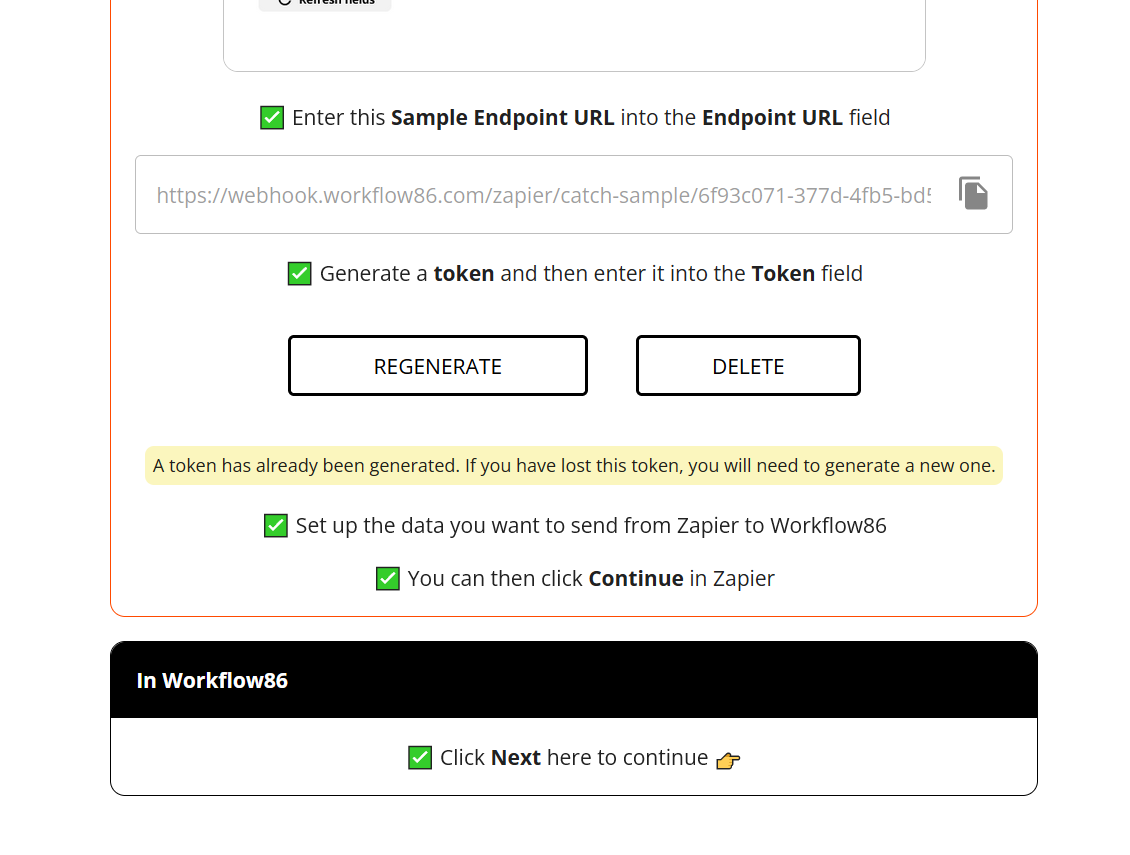
The first is the Sample endpoint URL - copy and paste this into Zapier here:
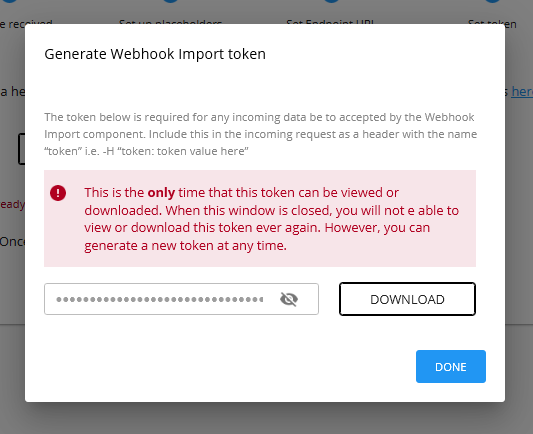
Next, you will need to generate a token which is used to ensure that the connection between Workflow86 and Zapier is secure. Click "Generate" to generate a token. A dialog will appear with the token. Copy and paste the token or download it - this is the only time you will be able to see the token. Once you close this dialog, it cannot be viewed again.
Your token is essentially a password into your workflow - if you have lost it, forgotten it, misplaced it, or think someone else might know it, you must delete the token and generate a new token. Think of it like losing the key to your house - regenerating a token is like resetting the locks on all doors and windows.
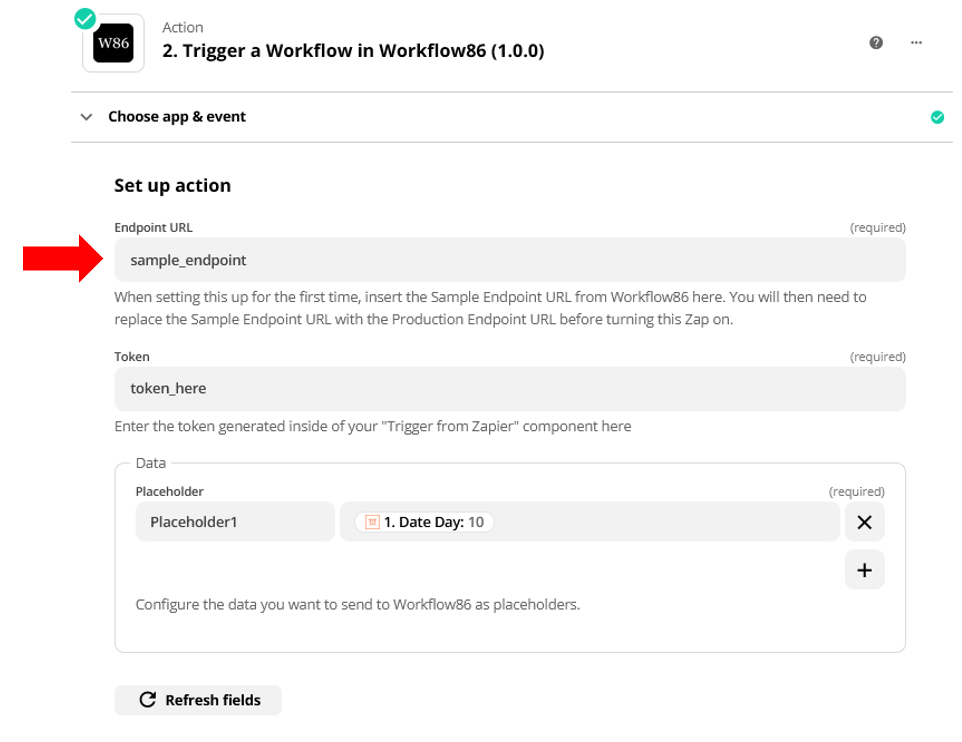
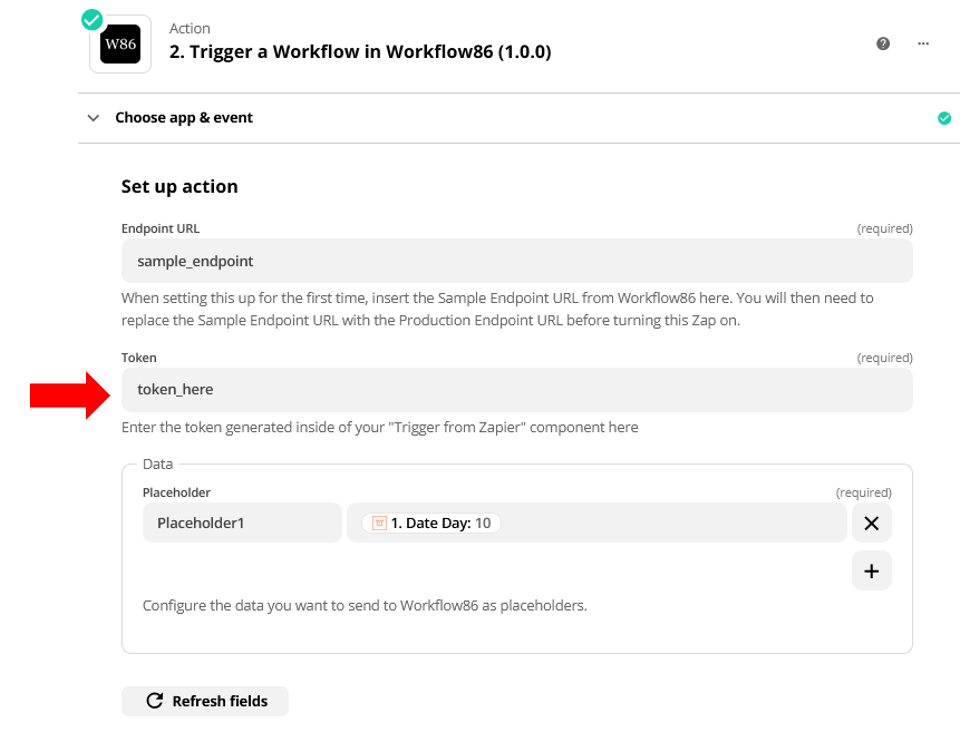
Insert this token in Zapier here:
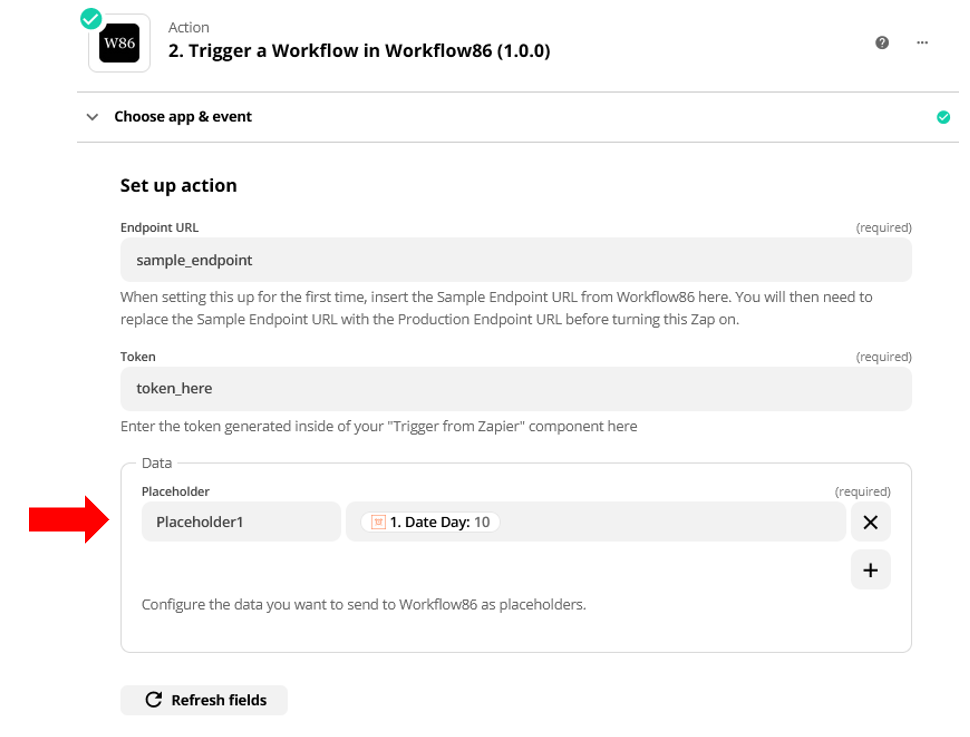
Once this is done, you can now configure the data you want to send from Zapier to Workflow86 here:
Click Next once all of these set up steps have been done in Zapier to move to Step 3.

Step 3 Send a sample from Zapier to Workflow86
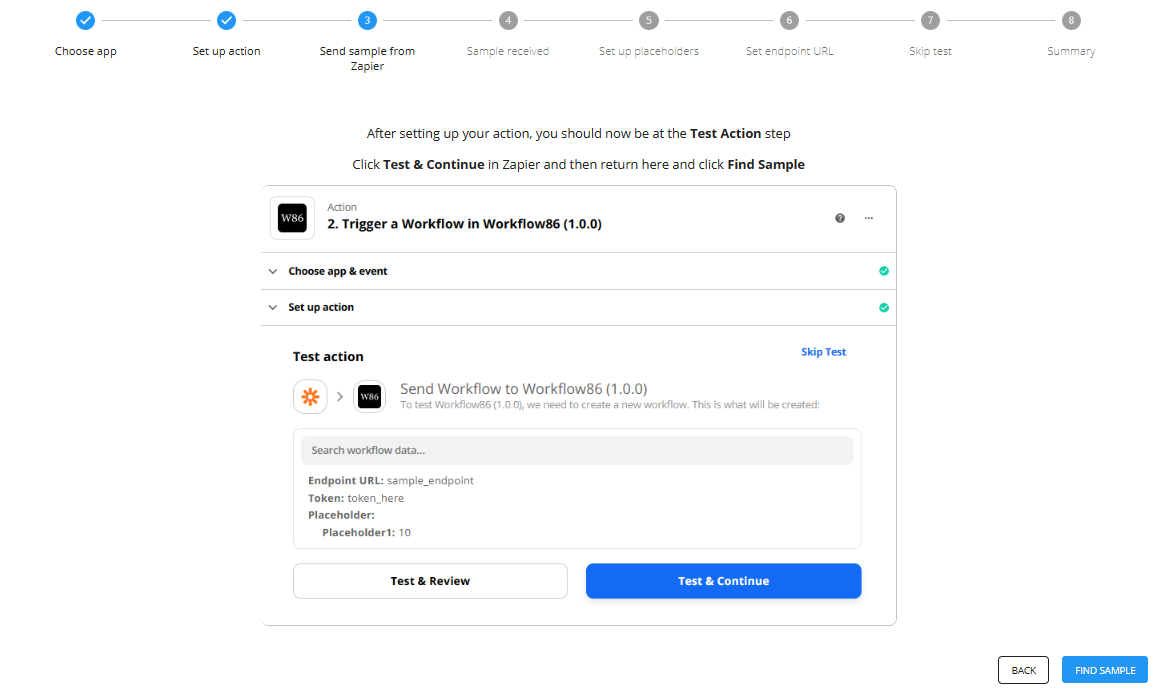
You should now be at the Test action stage in Zapier and Step 3 in Workflow86.
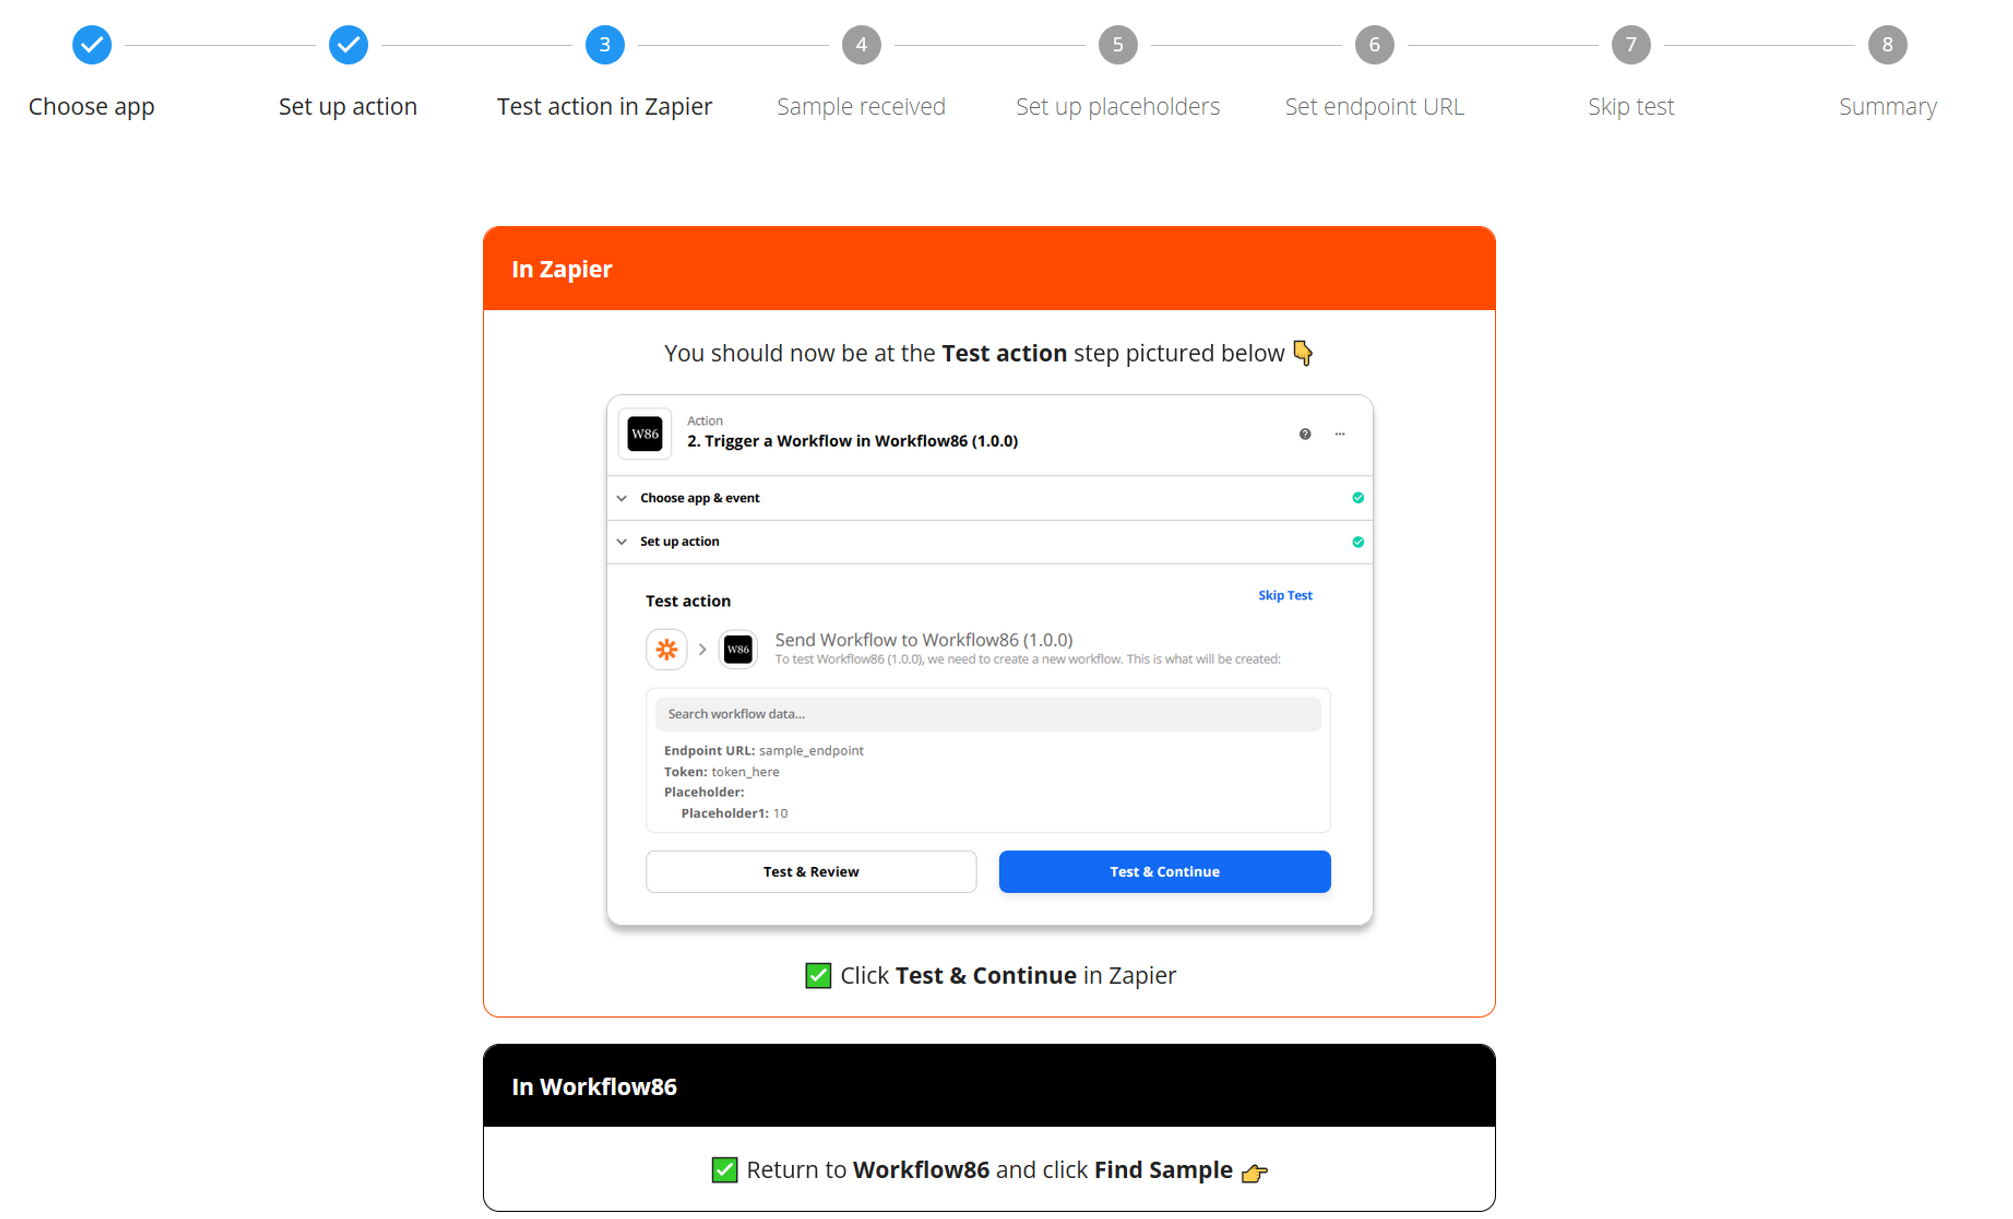
When sending a sample from Zapier to Workflow86, you must stay on Step 3 - do NOT navigate away from this step in the component. If you navigate back or forward to any other step, the sampling URL will not be open to accept samples.
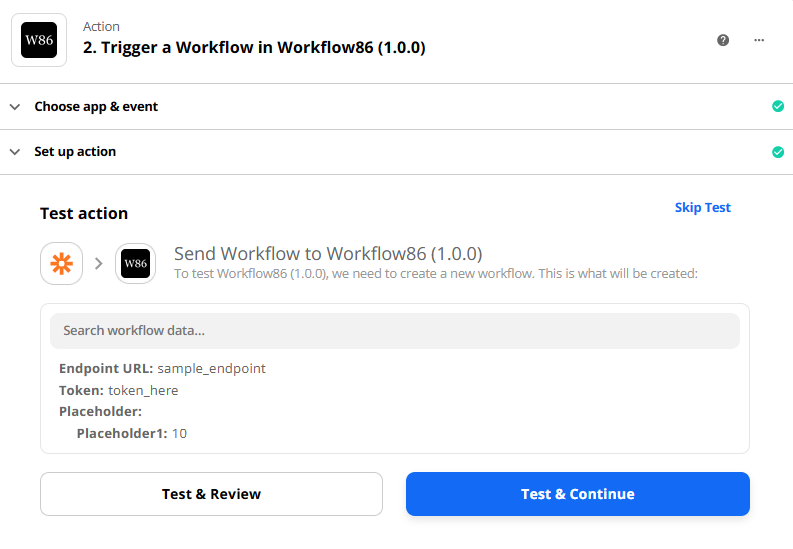
In Zapier, click "Test & Continue" to send a sample to Workflow86:
Then return to Workflow86 and click "Find Sample"
If a sample is found, the component set up will automatically move to Step 4. If a sample is not found, you can try again from Zapier.
Step 4 Sample Received
Inspect the sample data from Zapier to make sure everything looks correct. If something is incorrect or missing, click back and repeat step 3. This sample will be used to map the data from Zapier into placeholders for Workflow86. Carefully inspect the data to make sure everything is correct and all the data you need is included in the sample.
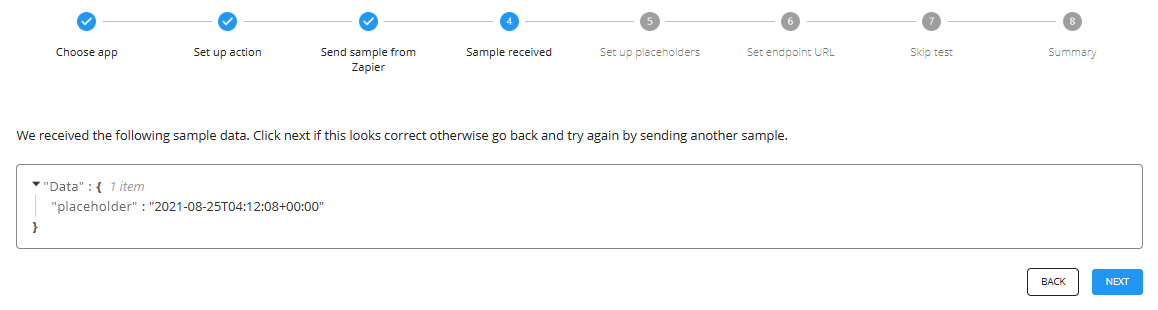
If everything is fine, click "Next" to proceed.
Step 5 Map placeholders
You will see that all the possible values that can be turned into placeholders from the sample data has been mapped out.
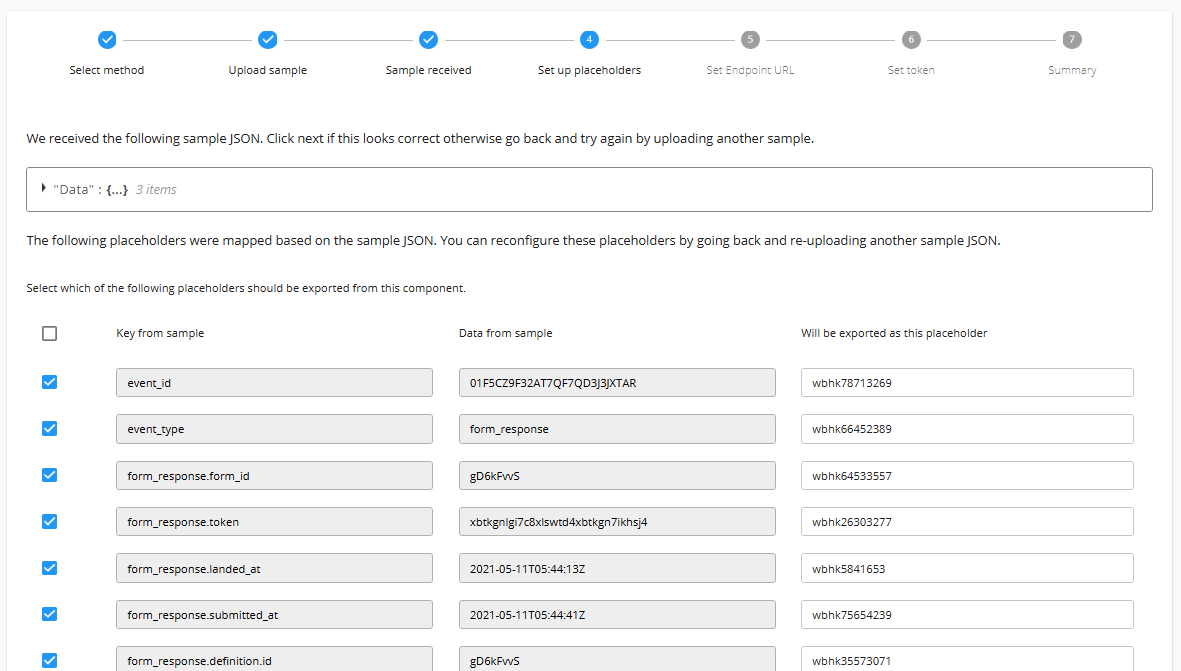
There are three columns, with the first two columns being the key and value pair from the data received. Here you can tick any data you would like to map, and untick any data you don't need mapped into placeholders. You can also change the name of placeholders in the third column.
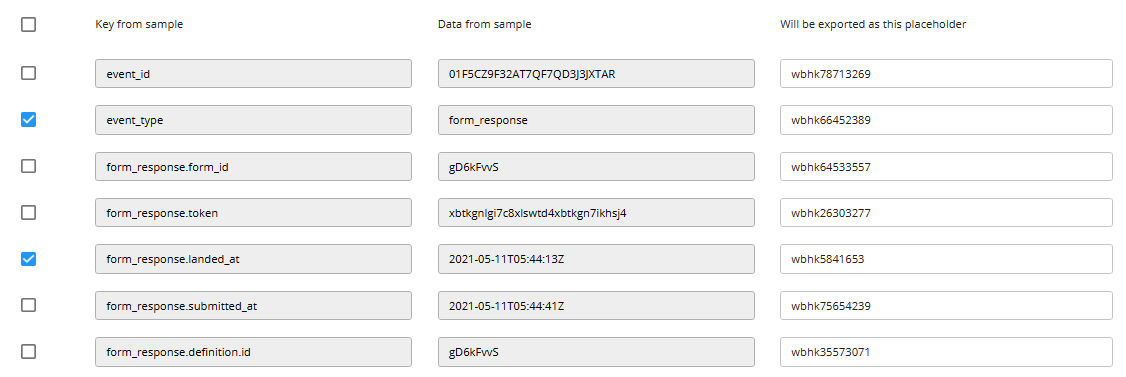
Once you have set up the mapping of the sample data to placeholders, click "Next" to proceed.
Step 6 Set the Production Endpoint URL
So far you have been using the Sample Endpoint URL - this is for setting up only, and doesn't actually work to trigger workflows. Copy the Production Endpoint URL found here:
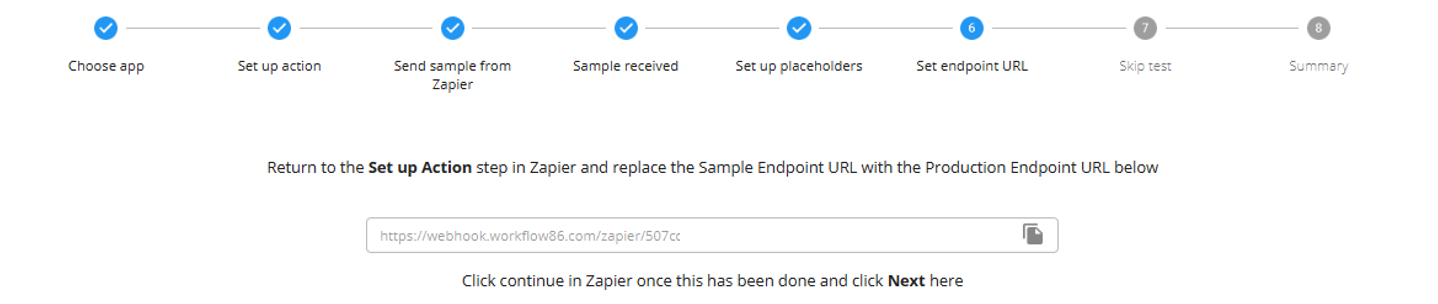
And going back to the Step up action step in Zapier, replace the earlier endpoint you entered in step 2 with this production endpoint URL:
Step 7 Skip test action in Zapier
Once you have replaced the Sample Endpoint URL with the Production Endpoint URL, you can click "Continue" and then "Skip Test" when you reach the Test Action step in Zapier:
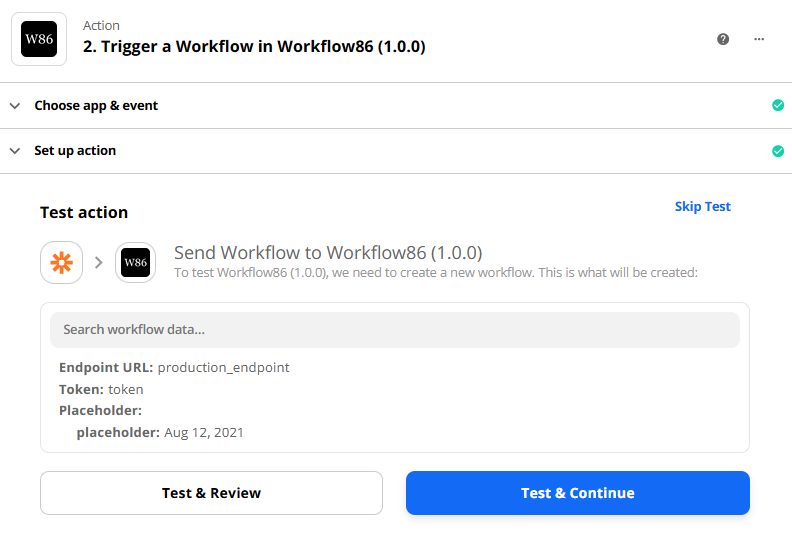
If you want to test your workflow, you will need to publish it first before pressing the "Test & Review" or "Test & Continue" button.
You can return to Workflow86 to finish the set up of the component.
Step 8 Set up completed
Once all set up steps have been completed, you should see a summary screen like this:
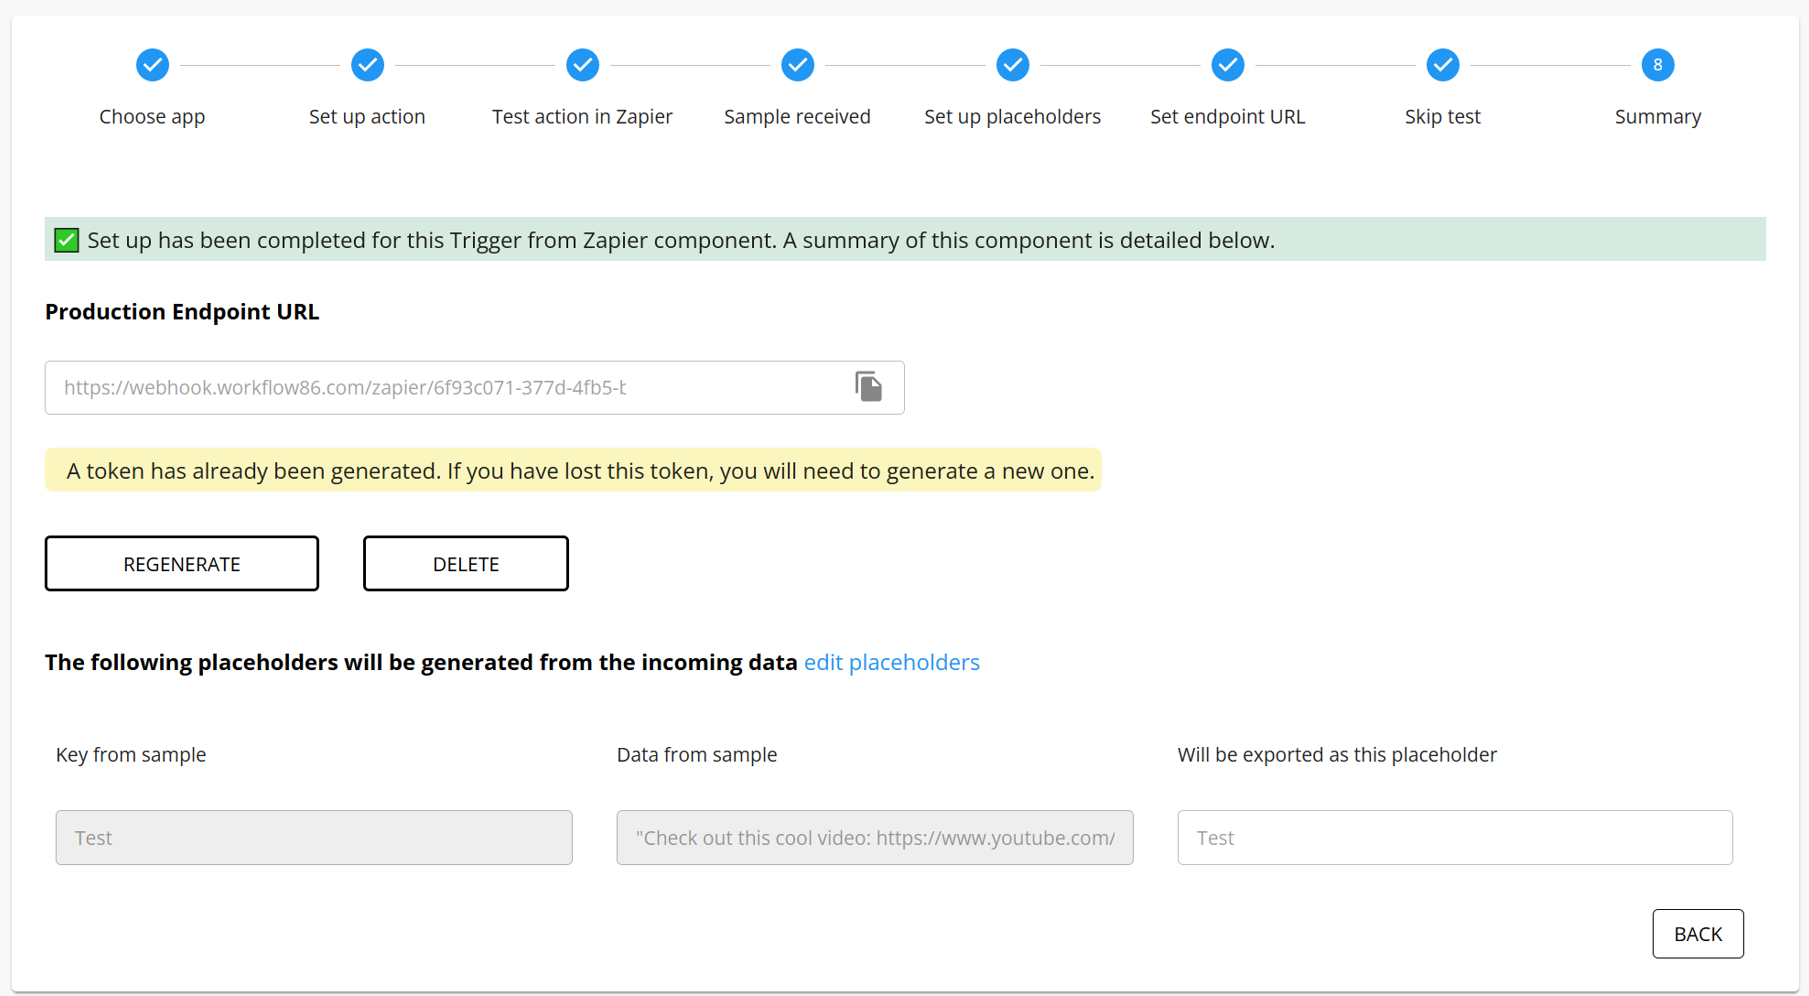
Turn on your zap to make the connection between Zapier and Workflow86 live. Zapier can now trigger workflows in Workflow86.
What if I want to change the data from Zapier to Workflow86?
When you set up the Trigger from Zapier component, we mapped the data coming in from Zapier using a particular data sample. If this changes (for example, if you want to add another placeholder from Zapier to Workflow86), you will need to go through steps 2 onwards again.