Webhook Import
| Component | Type | Description | |
|---|---|---|---|
 | Webhook Import | ▶️ trigger | import data and start a workflow via webhook |
The Webhook Import component allows you to trigger a workflow in real-time when data is received from another platform.
Webhooks open up countless possible integrations, but can be intimidating for non-technical users. Book a ➡ 1:1 session with our team if you need assistance with using or setting up a webhook.
What is a webhook?
Webhooks are one way that one app can communicate with another app. The webhook import component allows another app to send data to Workflow86 and trigger a workflow. What makes webhooks special is that they allow you to send data in real-time, as something occurs. Webhooks must have a data source pointing to an endpoint - the data source is the app sending the data and the endpoint is essentially the delivery address. The endpoint will wait for data to be sent to it, and then reacts when it receives something.
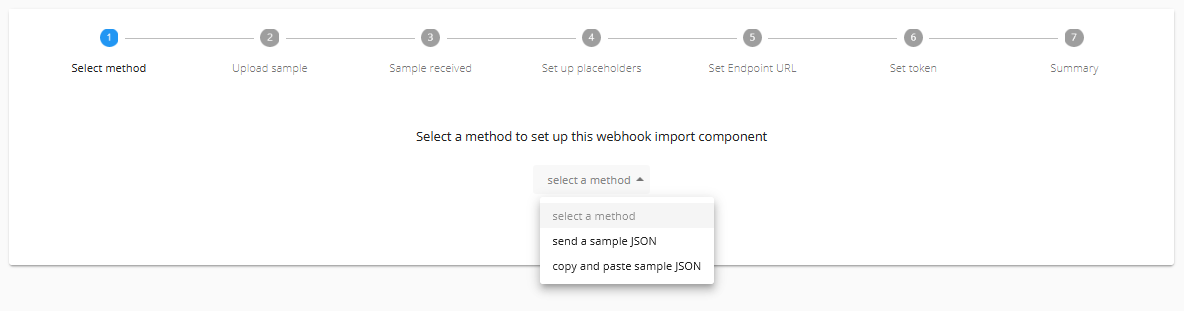
Select a method
To get started, there are two ways to set up a webhook import component: by sending a sample JSON to an endpoint, and by uploading a sample JSON.
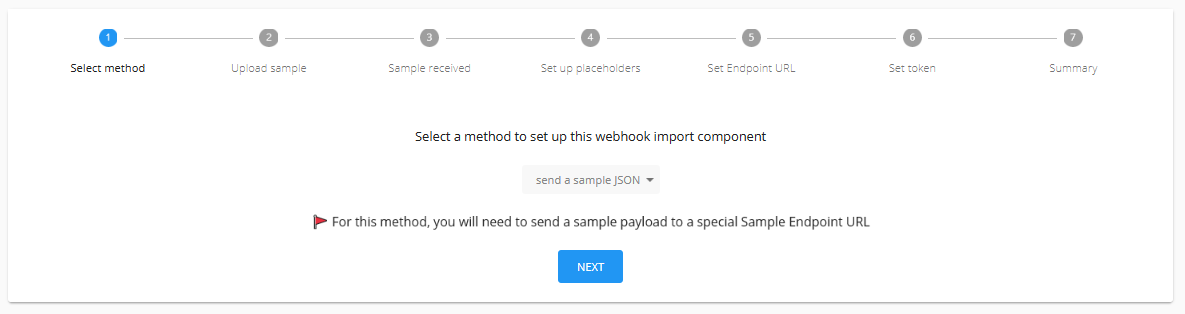
The recommended method is by sending a sample JSON, so this will be the focus for the rest of this page.
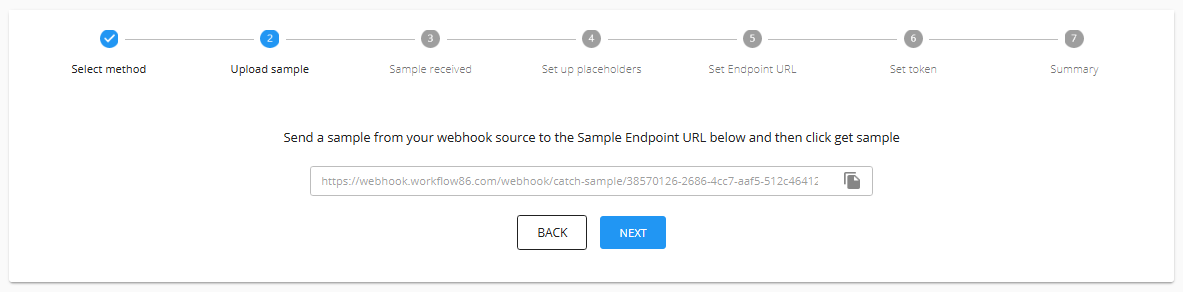
Send a sample to the Sample Endpoint URL
Once you have selected the send a sample JSOn method, you now need to send a sample JSON to the Sample Endpoint URL.
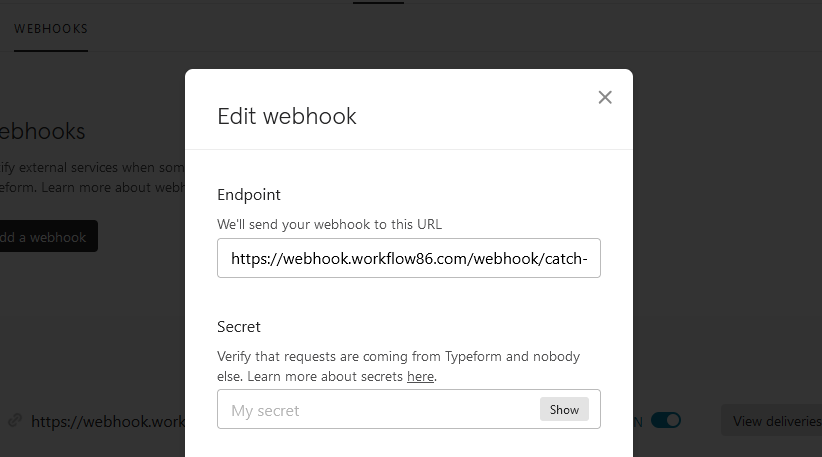
Copy and paste the URL into the app you are send the data from. In the example below, we are using the Typeform webhook feature and pasting it into the endpoint textfield.
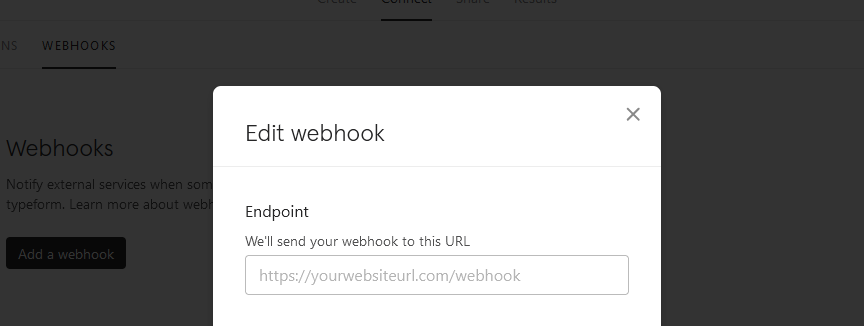
The Sample Endpoint URL is a special endpoint designed to receive and process samples data only. It will not trigger or run workflows, and you need to switch it with the production endpoint URL later on in the process
Once you have set up the endpoint in the app sending the data, have that app send a sample to the endpoint. How to send a sample will differ from app to app, and many apps will even have the ability to send a test payload. If you need help on how to send a sample, contact us and we can help.
In the case of our Typeform example, to submit a sample JSON we will submit a form. Once you have send a sample, click "Next" - the webhook import component will now wait and search for that sample.
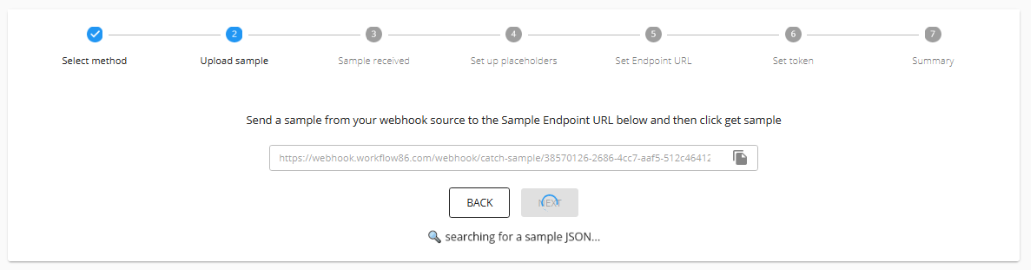
If a sample is found, you will progress to the next step.
Sample received
You will see the sample data that has been received from the Sample Endpoint URL. Carefully inspect the data to make sure everything is correct and all the data you need is included in the sample.
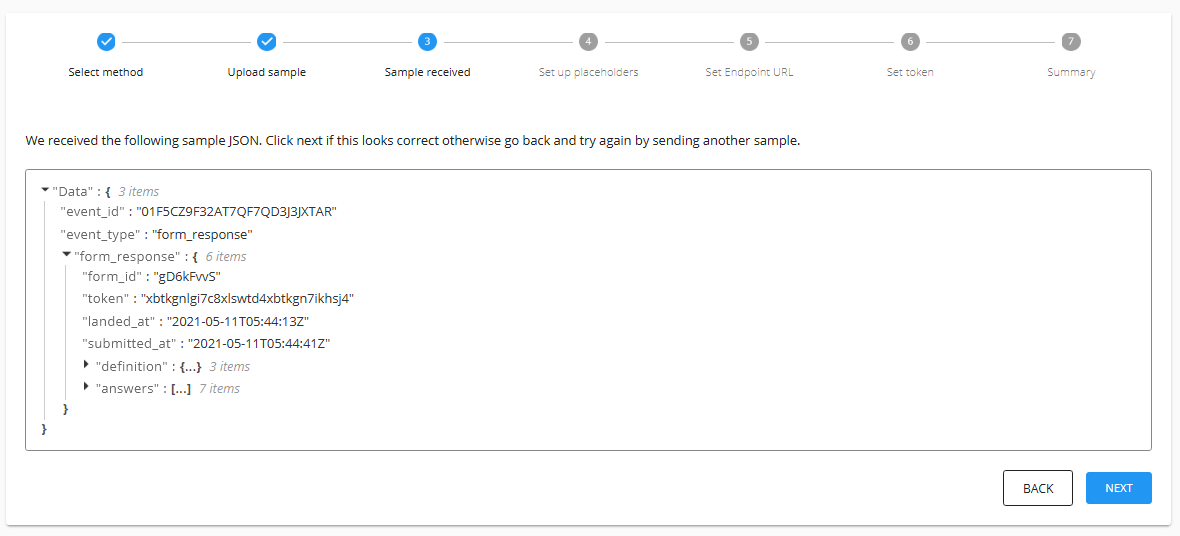
If everything is fine, click "Next" to proceed.
Set placeholders
Now that the webhook import component has a sample, it has something it can use to start mapping the incoming data into placeholders that you can use in the rest of the workflow.
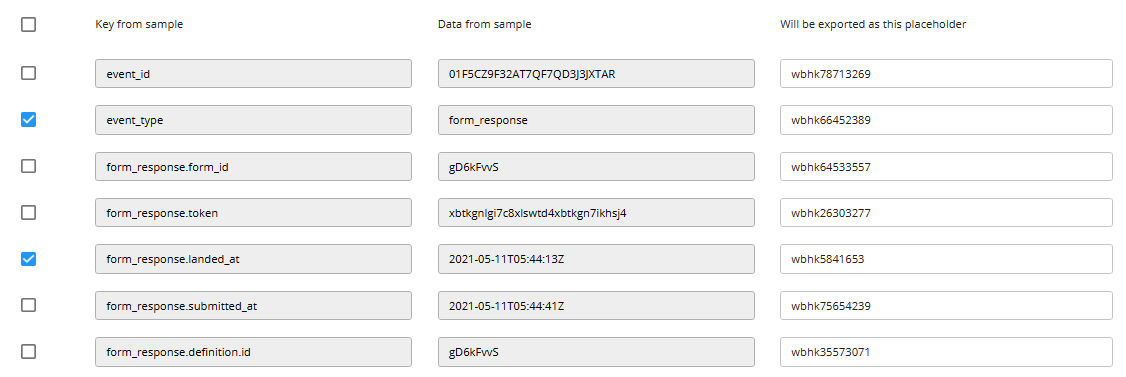
You will see that all the possible values that can be turned into placeholders have already been mapped.
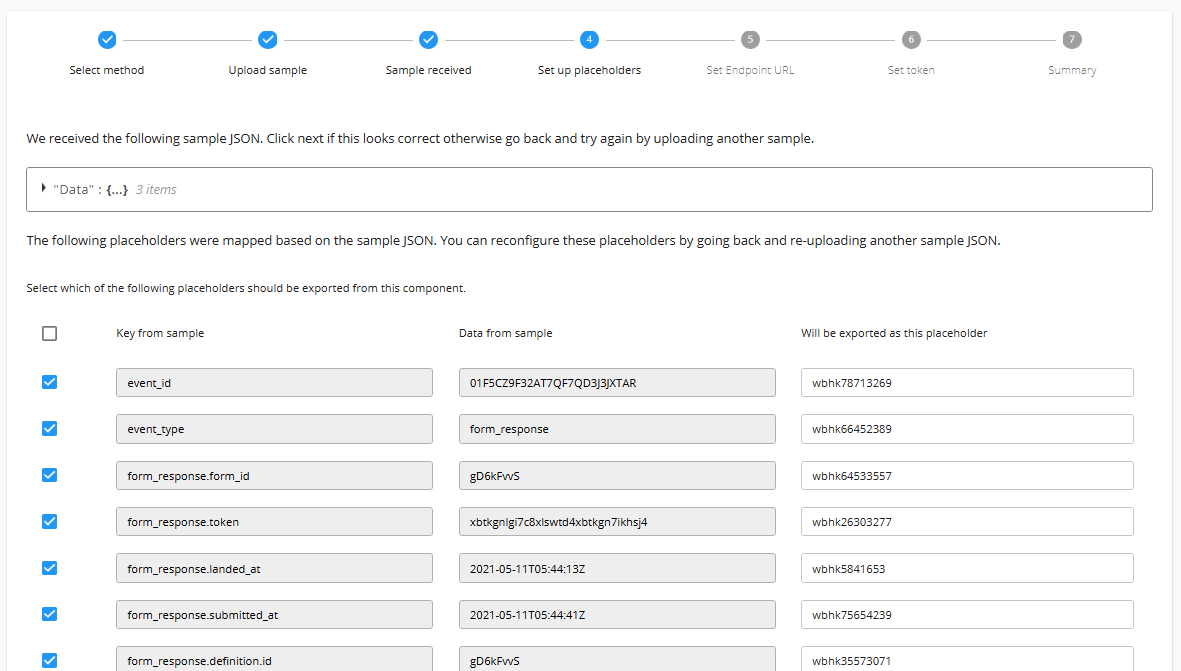
There are three columns, with the first two columns being the key and value pair from the data received. Here you can tick any data you would like to map, and untick any data you don't need mapped into placeholders. You can also change the name of placeholders in the third column.
Once you have set up the mapping of the sample data to placeholders, click "Next" to proceed.
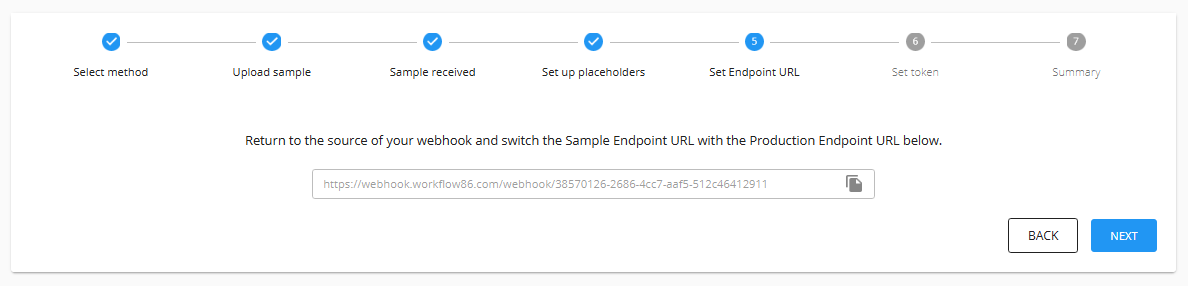
Set the Production Endpoint URL
So far you have been using the Sample Endpoint URL - this is for setting up only, and doesn't actually work to trigger workflows. You will now need to go back to the app sending the data, and switch the Sample Endpoint URL before, with the Production Endpoint URL seen here:
So in our case, we'll need to go back to Typeform and switch the endpoints
Once this is done, click next to proceed.
Generating and setting the token
This is an important step that ensures that your webhook import component is secured. Remember, the webhook import component is like a door into your workflow - you don't want anyone and anything having access to it. To ensure that only the correct apps have access to the workflow, we use a token. Think of a token like a password or a key.
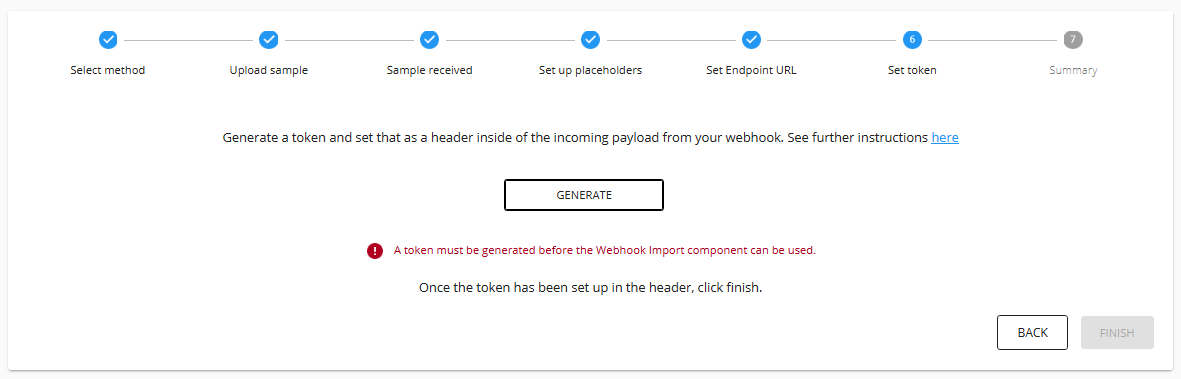
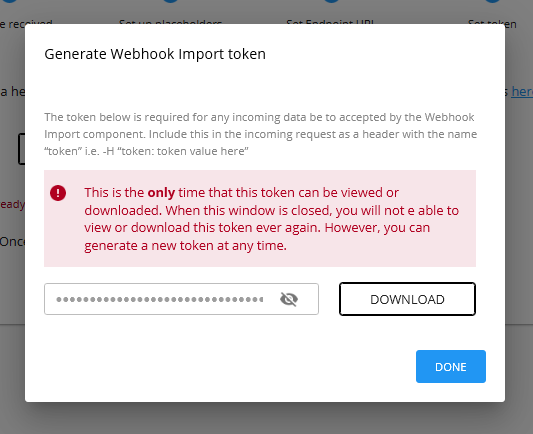
Click generate a token to create a token
A dialog will appear with the token. Copy and paste the token or download it - this is the only time you will be able to see the token. Once you close this dialog, it cannot be viewed again.
Once you have generated a token, your screen should look like this:
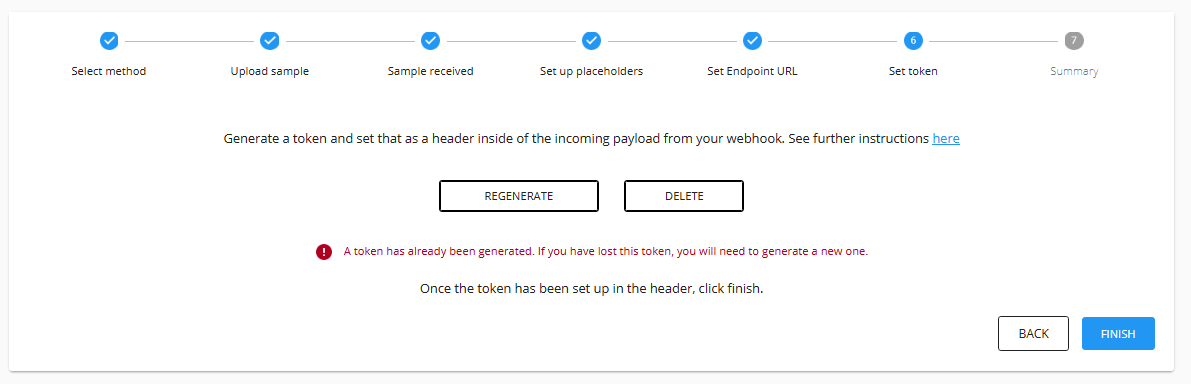
Your token is essentially a password into your workflow - if you have lost it, forgotten it, misplaced it, or think someone else might know it, you must delete the token and generate a new token. Think of it like losing the key to your house - regenerating a token is like resetting the locks on all doors and windows.
How to set the token
Correctly setting the token is essential to the security of the webhook import component and ensuring it works properly. If you are unsure of how to set up the token, please contact us and we can help.
Now that you have obtained your token, you will need to return to the app sending the data, and set the token using one of two methods.
Setting the token in the header (⭐ recommended)
The first method is the most secure and recommended method, and involves placing the token as a header in the incoming webhook playload, with "token" as the header key, and your token as the header value i.e. "token: you_token_here". Depending on the app, there will typically be a "add custom header" button that will allow you to configure this property.
For example, here is how it would be set in Webhooks by Zapier

Setting the token in the URL
The second method is to set the token inside of the Production Endpoint URL. This method is only recommended when the first method cannot be done. To use the second method, add "?token=your_token_here" to the end of the Production Endpoint URL. It should look something like this (inserting your actual token instead of "you_token_here"):
https://webhook.workflow86.com/webhook/catch-sample/38570312126-26aa86-4s232122c7-aaf5-512c421321641291133?token=your_token_here
Note that this method is considered less secure because you are disclosing your token in the Endpoint URL itself.
Once you have set up the token, click "Next" to proceed.
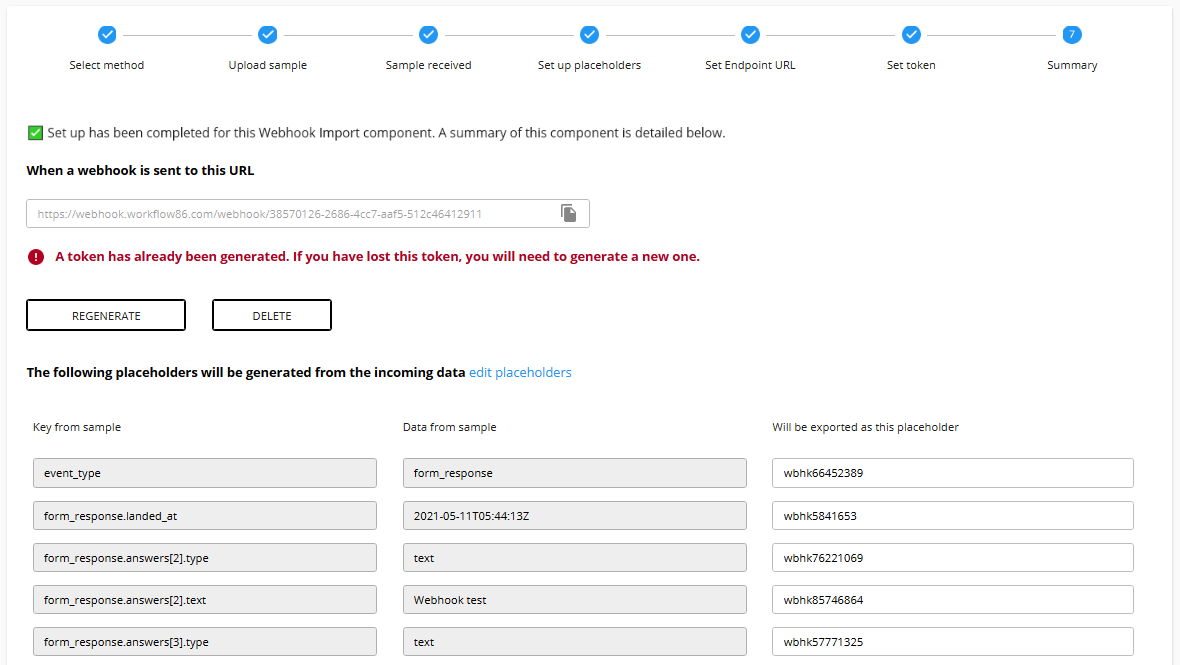
Finish
All steps in the webhook import set up have now been completed! You will see a summary page where you can access the Production Endpoint URL, delete and regenerate the token if needed, as well as the placeholders that will be exported from the incoming data.